
Santa wanted fleece pajamas this Christmas. Gaffneys Fabrics had only one choice that would do. It was moose on plaid. So I bought the fabric.

First I needed to correct the PJ pattern I had used in the past. My husband needs patterns to be higher at the center back neck and lower at the center front neck than is the case with commercial (home sewing) patterns. I used his shirt pattern to help with making that correction. His shirt pattern is the one I developed as a sample pattern for the upcoming Copying a Man’s Shirt course that starts Saturday, January 4. The photo on the right shows the corrected pattern after the neckline was raised at center back and lowered at center front. The corrected pattern combines the fit features of Santa’s custom drafted shirt and the looseness of the commercial PJ pattern. The red lines correct the black lines, the blue lines correct the red lines.
 I thought I had enough fabric, but I checked to be sure. The picture shows how I folded the fabric to check all patterns that need two plies cut. The large pattern in front on the right is the back pattern. The back pattern has been traced on the fold so as to be able to cut the back on the open. This fabric has to be cut to match. It is impossible to cut any fabric to match if the fabric is laid on the fold. That means that each and every piece has to be cut single ply.
 Since the garment had to be matched, next was determining where the hem should be. Cutting the garment so the PJ's shirt and pants’ hems would finish as shown with the black horizontal stripe just slightly above the fold would give a finished look to the PJs.
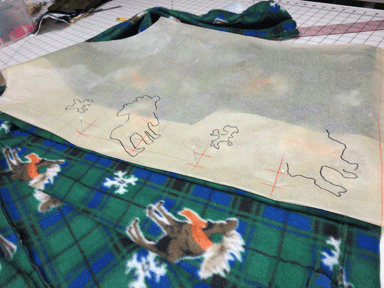
The center front had to be determined so as to maximize the print’s effectiveness. In the industry markers are used to help with placements when cutting to match. When cutting at home I use my patterns as markers, marking where I want the design to lie in the finished garment. This photo shows where I decided to have the moose lie in the finished PJ's shirt top.

Now it was time to cut. But much of this fleece was off grain. It had been knitted and printed on grain, but fleece is very stretchy and so is almost impossible to keep on grain. I used my L-squares, 4-foot straight edge (available at hardware stores) and my 18 inch transparent ruler to line up the fabric, forcing it back on grain. I did not press the fabric. All that mattered was that the fabric was on grain where I cut. If so, when the garment is sewn, the finished garment will hang on grain. This is extremely important. Garments cut on grain will last years longer than garments that are not cut on grain.
Cutting the PJ’s was a real task. The plaid helped, but the fabric seemed determined to give me grief. It might have cut easier if I had spread the fabric over tracing paper and cut the fabric and tracing paper together.
Although knit garments can be sewn entirely on a lockstitch (a basic sewing machine with a bobbin) using an overlock (home sewers call them sergers) makes the job much easier. I first prepped (overcast) the hem, waistband, and facing edges with a three-thread overlock. Then I converted my overlock machine to a mock-safety (four-thread) stitch to sew the seams.

The photo on the right shows the PJ’s side seam being sewn together with a mock-safety stitch. Note the black stitching in the center of the overcasting. It is that center stitching that gives the mock-safety stitch its stability.
The edge that lies at an angle down toward the left is a prepped edge. It has been overcast with three-thread stitching.
You can watch a video of this pant seam being sewn to match at https://www.facebook.com/photo.php?v=773183899377640&set=vb.151215644907805&type=2&theater
As you watch note that the plaid of the top ply of fabric is laid in place over the plaid in the bottom ply of fabric. No pinning or basting is used. Because the overlock has differential feed, both plies are fed into the machine at the same speed.
 Also note that the knife cuts only a few threads away as the fabric is fed into the machine. As done in industry the seam allowances on all seams that are overlocked have been drafted with the 3/8 inch bite width of the machine, preventing the need for the knife to cut away excess fabric.
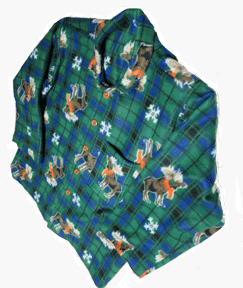
Here’s the result on the right. As you can see, the seam matches.
On the left is the finished shirt. The pocket seems low, but Santa wanted it there. The pants are almost done, but I've got to stop now and make supper.
Happy holidays!
Laurel
www.Laurelhoffmann.com- published books
www.ContemporaryFashionEducation.com- school
Facebook: Contemporary Fashion Education, Inc.
http://contemporaryfashioneducation.blogspot.com/
www.ContemporaryFashionEducation.com- school
Facebook: Contemporary Fashion Education, Inc.
http://contemporaryfashioneducation.blogspot.com/
P:215 884 7065, C:610 908 7222
One spot is still open in the Copying a Man's Shirt course that starts Saturday, January 4. For more information please visit: http://www.contemporaryfashioneducation.com/schedule.html

No comments:
Post a Comment